


Editor’s note: This is a continuation of a series of articles on low cost gardening. See Tip#1 on planning; Tip #2 on Soil; Tip # 3 on Compost; Tip # 4 on Tools; Tip # 5 on Containers.

Jane Mack
Gardening can provide relaxation. There is something soothing about working with dirt, seeing plants sprout, watering growing life, and touching and smelling the plants in your garden. There’s a connection to nature, and a healing power to gardening.
There’s also a potential, financial cost. If you’ve got the budget, you can afford the time-saving products and devices within your means. If you don’t have the budget, don’t give up! There are a lot of ways to garden with very low or no expenditure of funds.
A lot of what I’m sharing here is information I’ve gleaned from obsessive watching of YouTube videos, reading lots of articles and plant studies, and my own successes and failures. I am not an expert gardener—far from it! Just sharing what I’ve learned.
Here’s hoping these tips help.
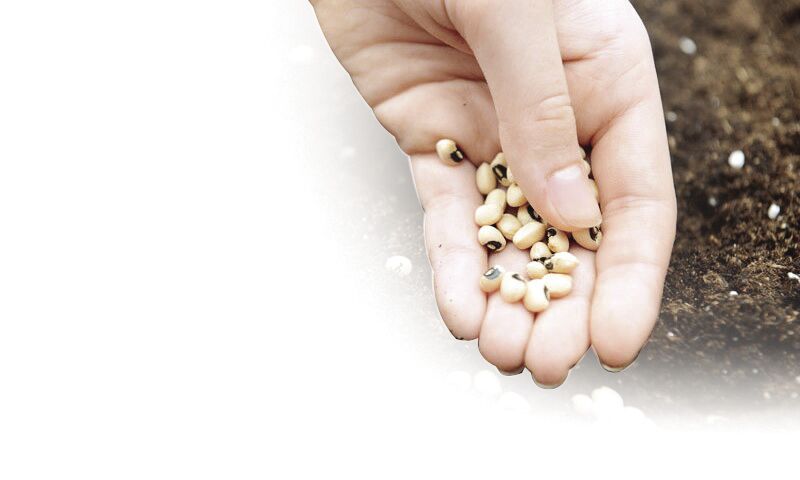
Tip #6: Seeds
Seeds are available at any of the garden centers and hardware stores. There are some things to pay attention to when you buy seed packets. First is the seed name and type. Make sure it’s designed for our “hardiness zone.” Another is company brand. Some are more reliable for seed germination than others; for example, I’ve had good luck with Burpee seeds. I’ve had bad luck with Ferry Morse seeds. I’ve seen others report the opposite experience! This could be me as a very inexpert gardener just learning; it could be coincidence; or it could be the seeds. You might also want to check the dates stamped on the seed packets. These aren’t expiration dates in the ordinary sense (you can use seeds dated for last year), but they tell you when the seeds are freshest. Seeds deteriorate in heat and light. So getting fresh seeds can make a difference in your germination rates. Keeping track in your plan and notes will help you know what works for you.
Before you buy any seeds, you want to be sure to watch this fantastic video:
- Saipan Supplemental Gardening, “Seed Basics”
This is our very first video, so please bare with us as we walk through the wonderful world of video editing. We intend to make “How To” videos on the basics of gardening and getting your garden started. We hope you enjoy this video and if you have any questions, please feel to contact us at angelshomegarden@gmail.com.
Our videos will be mostly catered to Pacific Islanders and anyone who live in a tropical climate near the equatorial belt. Please understand that certain things discussed will only apply to gardeners who live in Zones 12 and up.
We look forward to any positive criticism and input on topics you would like to hear more about or would like a walk through video of. We hope to spread the joy of gardening and encourage more people to get started on their own little gardening. If everyone grew a little something in their backyard, that would make all of us a little less dependent on imported goods!
Stay safe Marianas and happy gardening!
Cheap and easy. Another source of seeds is the grocery store, the farmer’s market, and the produce your friends, family, and neighbors give you! You can get seeds from a variety of plants—tomatoes, peppers (bell peppers of green, red, yellow varieties, jalapeños, any of the hot peppers available here), melons (cantaloupe, honeydew, watermelon), squash and pumpkins, cucumbers, and bitter melon, among others. You can get plant starters from your garlic, green onions, and potatoes. You can use dried beans. All of these are seeds that you can save from the food you’re buying or eating anyway!
I took a small local tomato that was going soft in my refrigerator and sliced it up, laid the slices in some dirt in pie tins, covered a little and watered. I ended up with 67 tomato seedlings! Some were puny from overcrowding, but after losing those and losing some to the boonie chickens, I ended up with more than 50 tomato plants, from one little tomato! The plants have started producing fruits, although the rains have caused some problems (like blossom end rot and split fruits). But I got a healthy crop of tomatoes (more than 600 tomatoes!) from one tomato I redirected to gardening.
You can save your seeds from the plants you grow and like, too. When you are successful, these are the seeds you want to use again and again.
Cheap and easy: Make your own seed packets from junk mail!
- Video: Project Diaries channel: “How to Make Free Seed Packets (No scissors or glue needed).
In Today’s Project Diary Video I will be showing you how to make free Home made Seed Packets from Junk Mail without using Scissors or Glue. Click this link https://www.tinyurl.com/SeedTemplate for an easy and free Template printout.
You can also get tree seeds from fruits, like papaya, avocado, mango, lemon, tangerine, calamansi, guava, star fruit, breadfruit (the seeded version) and soursop. Or get some coconuts that are sprouting. Trees grown from seeds can take a long time to fruit. They also may not produce true to the original fruit you started with, depending on what kind of fruit it is. For example, it’s generally recommended that you use a scion (growing tip of a successful tree) to graft onto a homegrown avocado tree, so that you get a fruit you know you’ll like. Mango trees likewise may not be true to seed, especially if they’re monoembryonic. If you don’t graft, and just plant and grow your avocado or mango tree from seed, you might plant a tree and wait for years, and find out it doesn’t produce fruit or produces a fruit that doesn’t taste good or has a yucky fiber content or some other problem.
Videos:
- Sleepy Lizard channel: “Should I Graft My Avocado Tree?”
Quick rundown on grafting vs growing an avocado tree from seed.
Clarification on the way DNA from rootstock gets into a seed: Sometimes a branch sprouts below the graft. We call that a “sucker” and it’s good practice to lop them off immediately. If a sucker is allowed to grow it eventually flowers and it’s pollen can fertilize a female flower. The resulting seed will carry rootstock DNA.
- Practical Primate channel: “Polyembryonic vs. Monoembryonic Mango Seeds”
I discuss the differences between polyembryonic and monoembryonic mango seeds and why both poly and monoembryonic mango seeds have their distinct advantages and disadvantages.
Read more about monoembryonic and polyembyonic seeds at https://practicalprimate.com/polyembryonic-vs-monoembryonic-seeds/
Visit Practical Primate at https://practicalprimate.com
Some plants grow directly from the bulbs or tubers, like garlic, onion, and potatoes. There is a lot of help on YouTube gardening channels if you’re interested in these.
Some plants do well in dry season; some prefer rainy season. Some need hot, direct sun and long days while others do better in cooler weather and shaded areas.
Some plants produce seedlings that can be replanted and others are better left in their original seeded place. When replanting, some plants can be planted deeply and will grow additional roots along their stems (like tomatoes) and some should not be planted beyond their current soil level because the additional dirt and moisture will rot their stem and introduce problems.
Some plants work well planted near each other (companion planting) and some plants fight with each other and don’t get along together.
All of this is to remind you to do your research. Go to your plan!
One last tip about seeds is that they generally should be stored in cool, dry conditions. That’s hard to accomplish in the CNMI! But you can find a dark corner in one of your cabinets and put them in a Tupperware or other tight storage container. One thing I’ve learned about starting mango seeds is to start with a fresh seed; wash it well, and let it dry a day or two, but don’t let it dry out for weeks or months! Same for avocado seeds. Fresh seeds work best! But in your plan, if you’re going to graft onto your seedling once you’ve got it going, make sure you’ve lined up everything (where you’ll get the scion; the right time to do it; how to do it; etc.). Remember tip#1—making a plan!
Good luck and happy gardening.